Help
If you have any questions, issues, or comments please send us an email at support@ifarmpro.com and we will be happy to help however we can.
Getting Started
- Creating an account
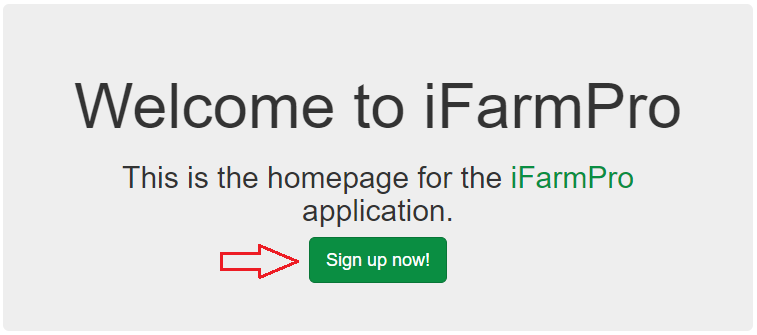
From the iFarmPro home page, click the "Sign up now!" button to begin the
process of creating a company.
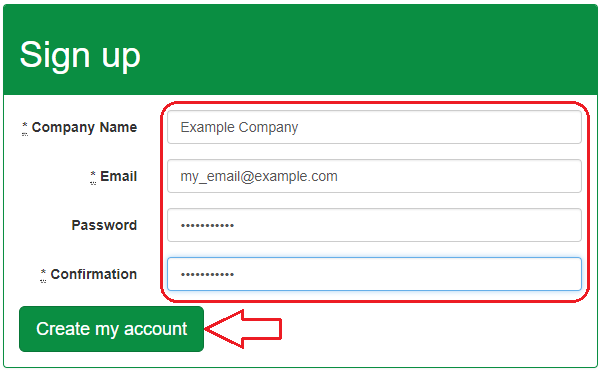
At the sign up page you will find a submission form requiring a company
name, an associated email, and a password with password confirmation.
Please ensure that you have access to the email address as this will be
important as you go along.
- Email Confirmation
Upon successful sign up you should see an email confirmation page. Now
you need to go to the email you signed up with.
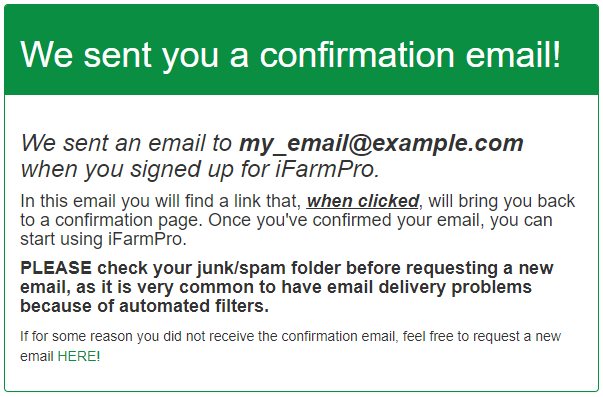
At this point you must verify your email by clicking the link that was
emailed to you. If you did not recieve an email, you may request a new
one on the above page. Make certain you did not recieve it before
making a request for a new email to prevent conflicts.
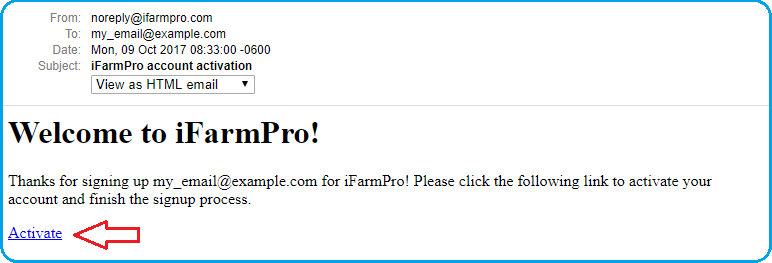
After verifying your email, the confirmation process is complete.
- Farm Setup
At this point you must setup your farm before you will be able to do
anything else. Begin by naming your farm and selecting the appropriate
weather station. You may name your farm whatever you like, but it is
important that you choose the right weather station for your area.
The second step is to declare and name all the wells you use for your
irrigations. This step is completely optional. You can name wells
whatever you like, but the Point of Diversion code (AKA LRG Number) is a
legal identification that should be labeled correctly.

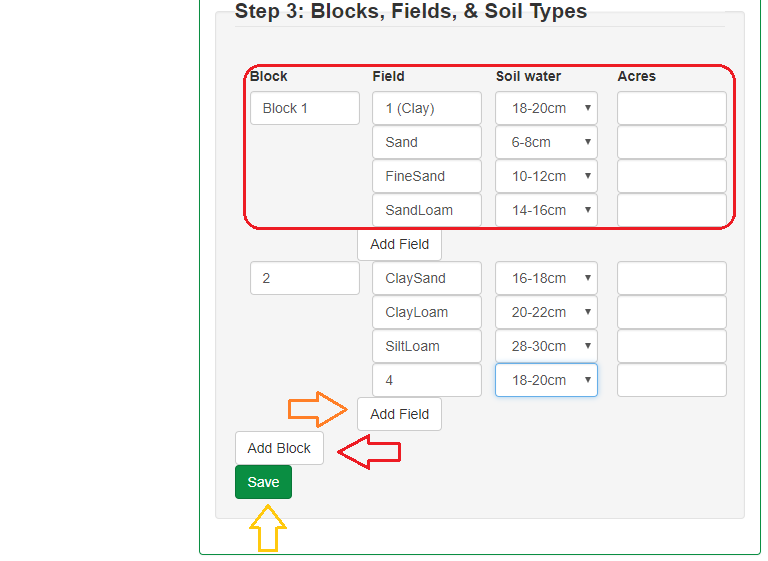
The final initialization step is to add your blocks, fields, soil type,
and acreage. The "Acres" field can be left blank, but you may also
fill this in if you prefer. Start by clicking the "Add Block" button.
Name the block whatever you like. An easily identifiable name is
recommended. Then click the "Add Field" button. Name the field whatever
you like. An easily identifiable name is recommended again. The soil
water section depends upon the soil type of your field. This piece is
most important to get correct because your schedule will be built based on
this information. Below are some examples of what your soil type and
corresponding soil water may be. Once this has been done, click the
"Save" button to finish setup.
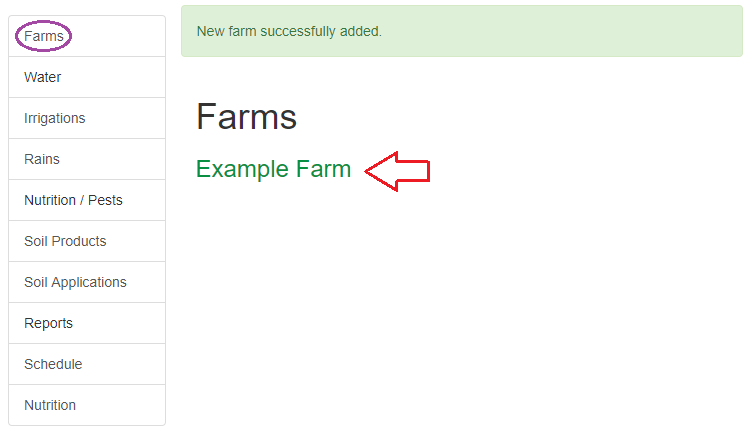
Once you've finished setting up your farm and you hit "Save", you should
see a page listing all the farms you have (one in this case). You can
click on the farm name to see the information you've put in, and from
there you get the option to edit the farm.
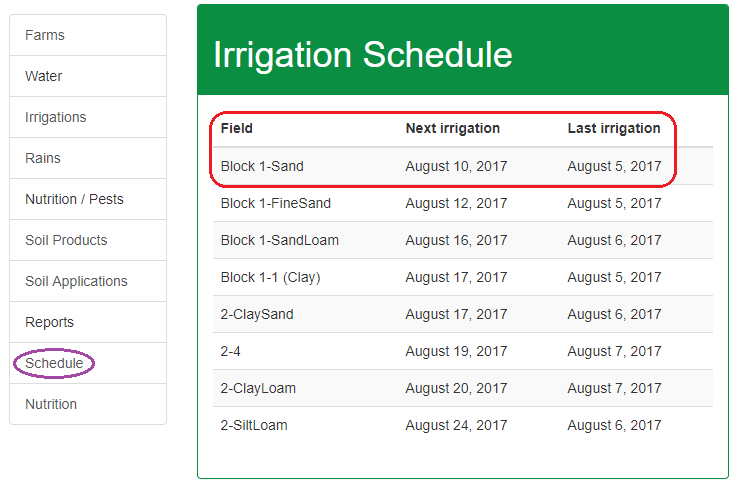
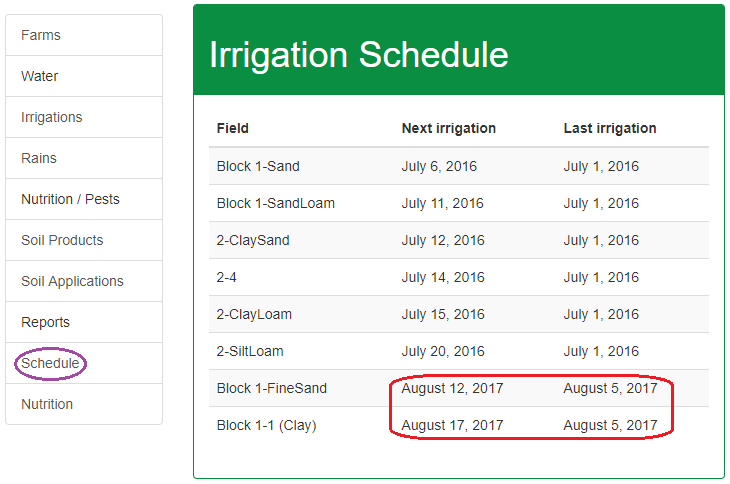
- Irrigation Schedule
Immediately after finishing farm setup, you may notice that your
irrigation schedule looks something like this:
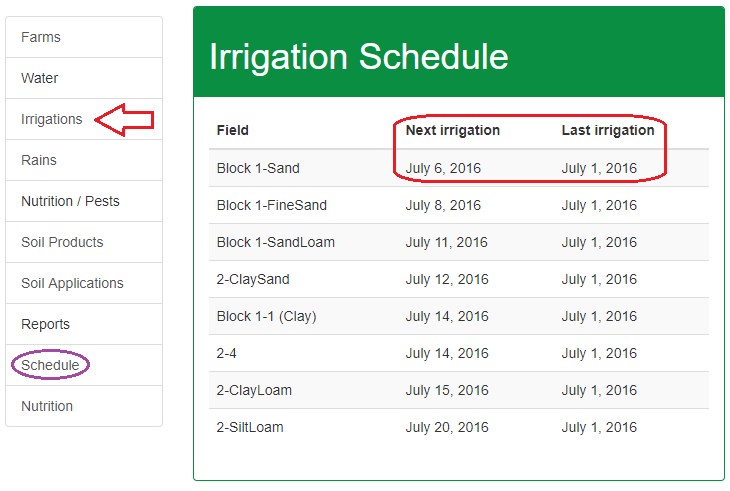
Naturally you've irrigated more recently than early July from a year ago.
This is a default value set to help ensure you don't leave a field out of
your schedule by accident. To resolve this, start by clicking on the
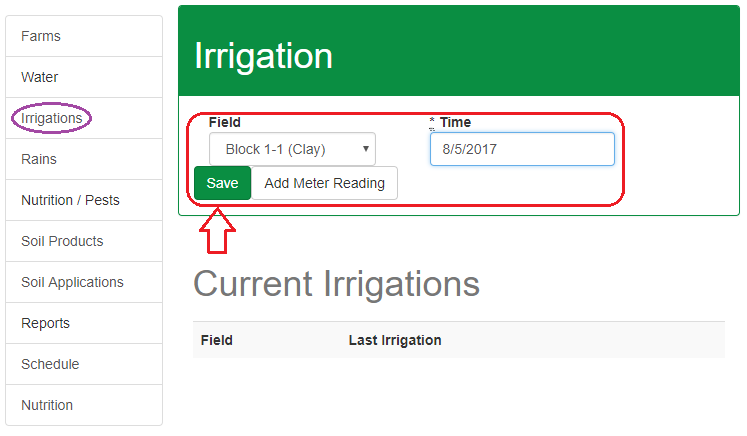
irrigations tab.
From there you should input a field, and the most recent time that it was
irrigated. This should be in the form of a date (mm/dd/yyyy). Then
click save.
Alternatively, you can enter a date and time of the last irrigation, and
use shorthand dates (m/d hour:min).
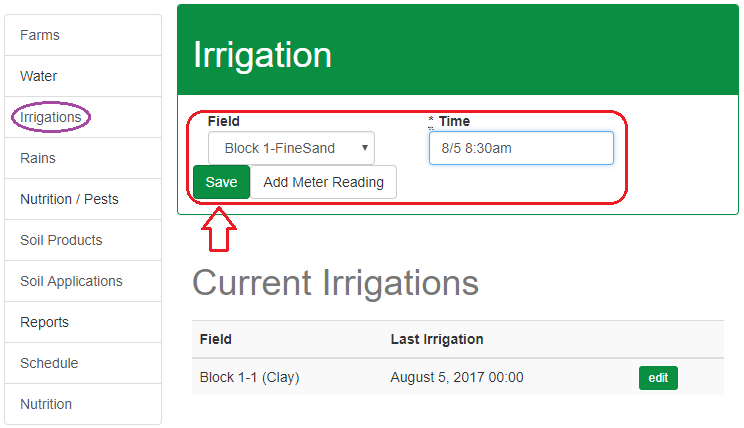
If the year is left blank, then it will default to the current year.
Similarly if the time is left blank, it will default to midnight (00:00)
of the input date. After a couple of fields, your schedule will look
something like this:
Repeat the steps until you have input the most recent irrigation for each
field. If at any point you save incorrect data, you can easily fix it
after clicking the edit button next to the mistaken irrigation.

Once you've input the data for each field, the schedule should tell you
when each is due for an irrigation based upon the soil type, and how long
since your last irrigation.